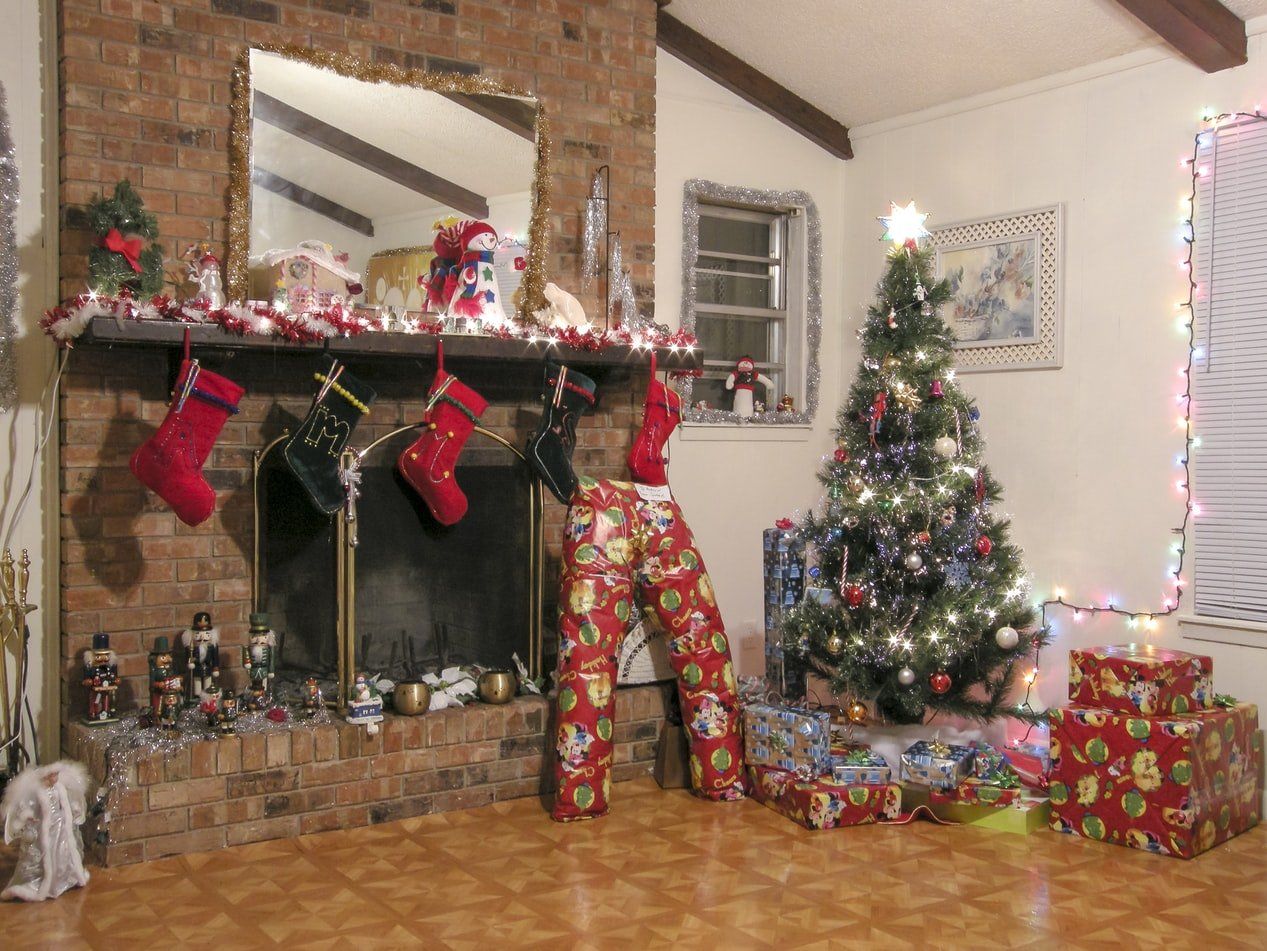
Anticipating Home Maintenance and Repairs

nat rosasco • March 25, 2018

For many people, owning their own home is an indication of true financial security and independence. However, your bank account will not get any rest even after the sale has gone through. When you own your own home, it means that any home maintenance and repairs that need to be made will be coming out of your pocket. When you first purchase your home, you are most likely aware of some things that need to be repaired, since you most likely had a home inspection. However, once you have been in your home for a bit of time, you will notice more and more home maintenance issues that arise that need your attention.  


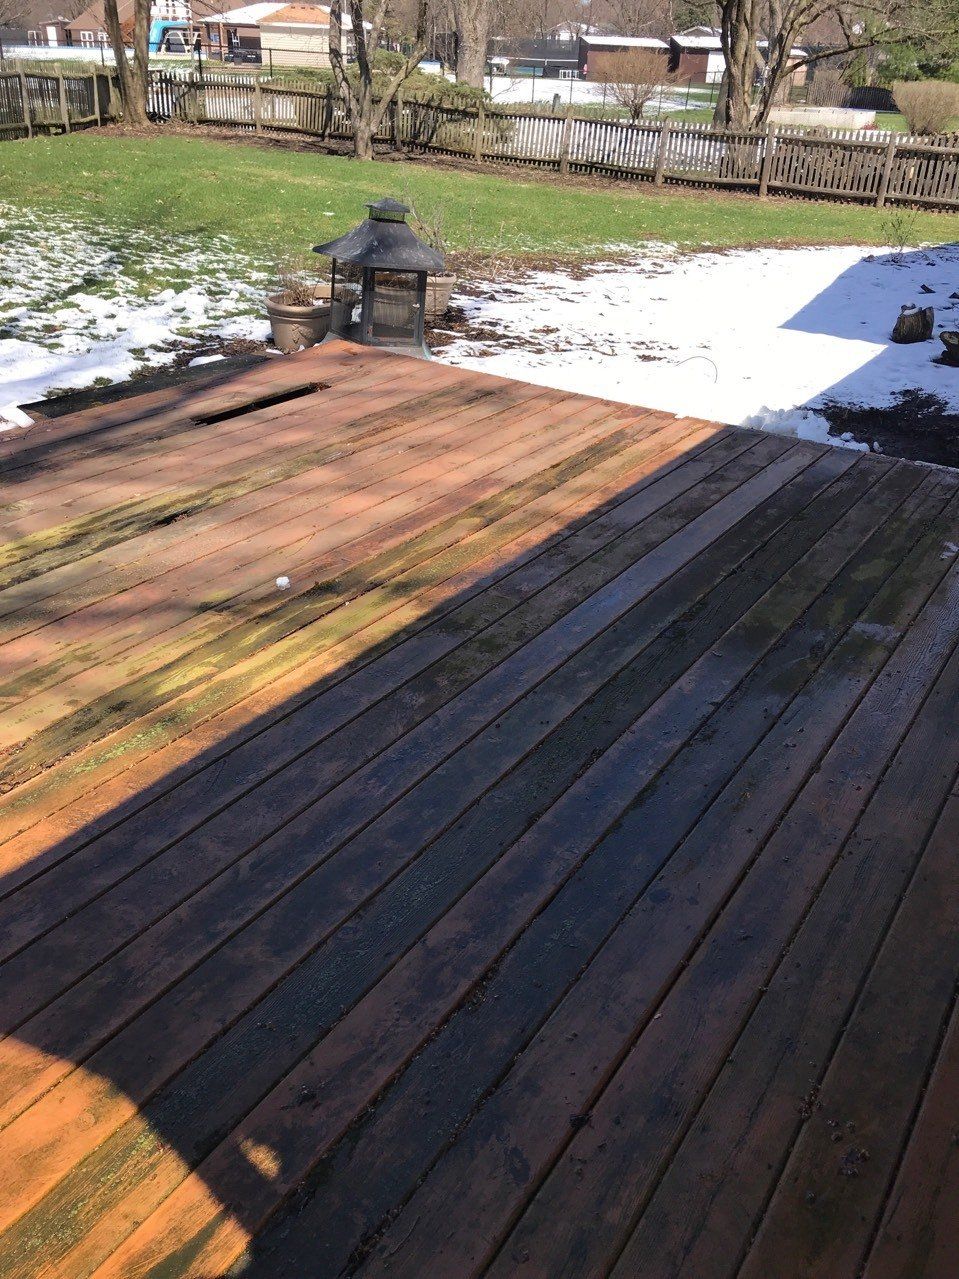
The amount of maintenance that your home will need is dependent on a few different factors. You need to consider how old the home is, since older homes do tend to need more updates and repairs. You also need to take into consideration how well the home has been maintained over the years. If the previous homeowners were diligent and stayed on top of repairs, you may not be hit too hard. If the home is in an area where the weather can be extreme, with freezing temperatures, ice storms, high winds or heavy rain, this can also have an impact on how much exterior home maintenance your home will require.


Often when you are buying a home, the seller will advertise what updates they have made and will often state the year in which the updates were made. This is very valuable information for the buyer, since they know what big ticket items they will not need to worry about for some time. If this information is not provided, you can ask your realtor and see if they can get that information for you.  


The general rule for anticipating costs for how much you will spend on home maintenance per year is called the 1% rule. This rule states that you should expect to pay 1% of the purchase price of your home, per year, in maintenance costs. Now of course there are exceptions to this rule, but this is a good general guideline that you should consider and factor into your budgeting for the year. There may be some years in which you spend less than this, and there may also be years in which you spend more.  


When you are buying a home, it is also good if you are able to find out what year all of the major appliances were installed, since there is a chance that some of them came with a warranty and repairs might still be covered. It also will give you a better idea of when you can expect to have to replace those items. There can be warranties for a variety of things in your house, including kitchen appliances, washing machine/dryers, ceiling and exhaust fans, plumbing, heating and electrical system components, water heaters and garbage disposals. If the previous homeowner saved any of the original user manuals, this will also be a very helpful tool for you.  


When you are able to budget for and anticipate home repairs, it will make it a lot less painful when those home repairs need to be done.  

By nat rosasco January 2, 2020
Space heaters are super useful and affordable appliances, but it’s important that you know what safety tips to apply so you can avoid any accidents. The first safety tip I’m giving you today is that you make sure you get your space heater from a provider with all the clearances necessary to guarantee that their product is safe. You will also need to select a model that suits your area the best. Some space heaters require little space because they can be hung on the wall, but others will need more room. Make sure you place it at least 3 feet away from any furniture, curtains, rugs, and other combustible materials. This is one of the most important space heater safety tips because they can cause a risk of fire if they encounter such materials. It’s also important you don’t place anything on top of the space heater and make sure it’s placed on a hard surface. When you’re choosing your space heater, do make sure the model you choose has safety features including overheat protection, tip-over protection and cool-touch housing so you can avoid any issues. Once you get a proper space heater, you must plug it directly into an outlet with the necessary power capacity. Don’t use extension cords because it can cause the risk of electrical shock injuries, fires, and overheating. If you don’t have a choice but to use an extension cord, make sure you choose one that’s properly sized and rated for this appliance. Another important safety tip is to make sure your space heater is well kept and maintained. Inspect the cord for fraying or damage and keep it clean from dust and hair so it can work without any issues whatsoever. Do this upon first use out of the box along with the beginning and end of each season of use. Whenever you’re not using your space heater, make sure you turn it off and unplug it. Many space heater models nowadays include the option of programming automatic shut down and turn on, so make sure you use that feature if available so that your space heater is not on when it doesn’t need to be. Your space heater should also be kept away from water and humidity, so don’t place them in damp, humid spaces such as basements or bathrooms. Also, make sure never to touch your space heater with wet hands because this creates the risk of electric shock. If you need a space heater in your bathroom, make sure you purchase one that’s safe and designed for this kind of use. When you have a space heater at home, it’s important that you learn about safety and you teach everyone in your family as well. To use your appliances safely, you need to learn the do’s and don’ts. Feel free to ask your provider for advice as well, but also make sure to do your own research and take the necessary measures to use your space heater safely.
By nat rosasco January 2, 2020
Your bathroom is one of the most humid rooms at home and it’s one of the most prone to water leaks as well. This means that there’s a high risk of peeling paint, which leads to mildew and bacteria buildup. Not to mention peeling paint makes your bathroom look in bad shape, which is not something you want. That’s why today I want to provide a few tips to help you avoid mildew and peeling paint in your bathroom and a few solutions in case it’s already happening! How to Prevent Mildew and Peeling Paint in Your Bathroom The very first thing you need to do to prevent peeling paint and everything else that comes along is have a family meeting. In this family meeting, it’s important to discuss water usage and to promote the idea of taking shorter showers. This won’t only help you be a bit greener at home, it will also save you money in the long run and it will preserve your bathroom for longer. Another important thing you can do to prevent peeling pain is to install an exhaust fan if you don’t already have one. If you do have one, then make sure you maintain it by keeping it clean and operational. Remember the fan blades and the motor gather dust and grime, so make sure you clean it with warm soapy water on a monthly basis. Also, make sure the fan is large enough for your bathroom. Proper ventilation is important. Your exhaust fan shouldn’t only be the proper size, it should also be properly ducted to your house’s exterior. If it’s ducted to the attic, for example, this will only create excess moisture and it will lead to rot. Also, it’s a good idea to have both your light and your fan operating on the same light switch so that it works every time you turn on the light. Finally, you should also have a timer installed in your bathroom. If everyone tends to take half hour showers, make sure you teach everyone at home to use the one-hour mode on the timer. This will allow the fan to fight moisture for the duration of the shower and an additional half an hour after that. What to Do if You Already Have Peeling Paint The first thing you need to do is to remove all the chipped paint with a paint scraper or a putty knife. Remove them all, and make sure you protect your eyes and wear a mask so you don’t inhale the dust and paint. Once you get rid of all the chipped paint, you’ll have to even out the surface by patching it out. Apply thin layers and let it dry well. Once the patched areas are dry, sand them with sandpaper so you can have a smooth surface. Next, you’ll want to prime the bathroom walls with an oil-based primer so you can prevent water marks and peeling paint in the future. Let it dry well. Now it’s simply time to repaint your bathroom walls and ceiling! Call Classic Handyman at 847-651-5847 for more tips and help on completing this project
By Ryan Smith December 20, 2019
Oftentimes, inspectors and contractors will receive phone calls from homeowners who describe a mold problem that has recently developed on the walls and ceilings of their homes. Sometimes, they describe the mold patterns as black stains on the walls and ceilings that seem to be following the framing of the house. The good news for these homeowners is that the stains are not mold and they are unlikely to present a health hazard to the occupants or a structural hazard to the building. The problem they are describing is called “ghosting” or “thermal bridging,” and, though innocuous, it can be a nuisance. If you are out touring homes you will occasionally find a house with this unusual staining pattern and it is helpful to understand why it is happening and what can be done to correct it. Understanding the problem of ghosting To visualize thermal bridging, let’s think about a house in the wintertime – say, in the cold climate of Salt Lake City. You are inside your cozy warm home cooking and cleaning and breathing and showering and this creates humidity inside the home. You might also be burning candles, incense or wood for a fire. In the winter, the insulation in your house, if it is doing its job, will help keep the cold out and the warm in. The insulation is installed in the stud bays inside the walls and on the floor of the attic. The limiting factor for most insulation is that it does not cover the wood framing of the building, just the empty spaces between the framing. Ghosting happens when mildly damp, warm and possibly sooty interior air condenses on the sections of walls and ceiling that are colder because they are that uninsulated section of the wood frame. The result: black sooty stains on your walls and ceilings that follow the patterns of the framing. Sometimes you can even see the nails in the sheetrock which, because they are metal, are even colder and more prone to becoming a condensing surface. Typically, the amount of condensation is not enough to cause a mold or structural problem, but it does create irritating lines on your walls and ceilings. So … how do you fix this? Understanding how to repair ghosting and black stains The first thing you need to do to stop ghosting is eliminate indoor air particulate: Stop burning candles, firewood or incense. The next step is to monitor your relative humidity inside the house: Buy an inexpensive relative humidity and temperature meter and try and keep your indoor relative humidity below 55 percent during the cold winter months. You can typically do this by turning on bath fans, which will have a drying effect on your building as you vent moist warm air to the outside and replace it with dry cold air. Finally, you will need to use a stain-killing paint to seal up the stains and then repaint the walls and ceilings. This is the expensive and inconvenient part. If you see the staining developing in larger patterns on the wall or ceiling, in places between the framing, this indicates the wall or ceiling is likely not insulated correctly. The repair, in that case, unfortunately, is to open up the wall or ceiling and insulate it properly. What if the black stains are actually mold? If you call a professional and determine that the black stains are actually mold, you have a few options depending on how severe the mold is. Regardless of what you do, it essential that you contact an expert to appraise the situation and determine the health risks and the extent of the issue. Once you’ve done so, you can call in a cleaning company, which will scrub the infected area down with special detergents and cleaning agents. Or, if the mold is less severe, you can create a mixture of cleaning agents and scrub the mold yourself. To do this, follow the steps below: Create a solution that is 1/4 bleach and 3/4 water. Thoroughly soak the affected areas of the wall until it is saturated with the solution. Let the solution soak into the affected areas for ~5-10 minutes. Scrub the affected area with a brush until the mold stains are removed. Repeat until stains have been cleansed. If you determine that the mold is actually beneath the surface of the wall, you can spray the affected area with a mixture of white vinegar and water and let it dry. Either way, it’s important to consult with your local mold removal expert and/or your local cleaning experts. They can help you determine the severity and extent of the problem, whether it’s ghosting and black stains on the walls or mold. How can I prevent mold from forming? To prevent mold from forming, check out the following tips: Make sure to run your bathroom’s fan while bathing and after to prevent moisture from accumulating. If possible, shower with the door open to encourage circulation and proper ventilation. Mop up any significant spills from water or other liquids quickly. Use mold-resistant paint in bathrooms and other rooms where there is significant moisture. Clean your bathroom frequently. We hope this helps you better understand what you are seeing in your own home or in homes on the housing market you are evaluating to purchase. Enjoy your house hunting! Remember, knowledge makes it fun. Originally published by Ryan Smith https://www.redfin.com/blog/black-stains-on-the-walls/
By nat rosasco December 19, 2019
The holidays are finally here and we couldn’t be more excited. But, there’s one thing we need to keep in mind: the safety of our pets at home. There are so many Christmas decorations, so much food everywhere you look and so many people coming and going that accidents can happen. Consider these pet safety tips and enjoy your peace of mind this holiday season! 1. Pet-proof your Christmas tree Your Christmas tree may be the single most dangerous thing for your pets during the holidays. Okay, that was a bit dramatic, but in all seriousness, you must pet-proof your Christmas tree no matter what. This is one of those things you shouldn’t skip because pets are super curious, and a Christmas tree is impossible for them to just ignore. This can result in upset stomachs and accidents, which leads to expensive veterinarian bills. What you can do is create a barrier between your pets and the Christmas tree by placing a baby gate or something similar. Also, anchor the tree securely so it doesn’t come crashing down if your cat or dog manages to jump onto it. Trust me, it will happen, so prepare for it. 2. Keep the tree water out of reach If your Christmas tree is natural or you bring other live plants into your home during the season, make sure the water reservoir is out of reach from your pets. Your Christmas tree can release toxic sap when it drinks water, and because the stand smells so good, your pets will be in danger of ingesting that sap. To keep that from happening, make sure you block their access to the tree stand. 3. Pet-proof your Christmas lights Christmas lights can be a real threat to the safety of your pets, not just because they could get tangled in them and get injured, but also because of potentially deadly internal injuries, intestinal blockage or electrocution due to chewing on the holiday lights. To make sure this doesn’t happen, fasten the Christmas lights tightly and keep the cords out of reach from your pet’s mouths. Also, block their access to loose cords or cables of any kind, which is something you should do year-round. 4. Keep ornaments out of reach as well Ornaments look like toys to your pets, so you can bet they will try to chew on them or maybe even eat them. This poses a threat because they could get cuts in their mouths, throats, digestive systems, and it could cause other serious injuries. Especially if the ornaments get eaten. Make sure you hang them just out of reach and place a barrier between your pets and your Christmas tree. 5. Keep gifts and candy away Your beautifully wrapped gifts look amazing under the tree, just make sure your pets don’t have access to them. I recommend you place them under the tree on Christmas morning, not before. Candy should also be kept away because your pets could easily get sick from eating something they shouldn’t. Hang your stockings high, and just keep an eye on things!
By nat rosasco December 19, 2019
Sump pumps are vital appliances because they keep your basements and crawl space safe from water buildup and it also protects your home from floods. The sump pump achieves this by collecting all standing water and pumping it to the outside of the house. This appliance is wonderful because it works on its own and you simply feel better having it because you know it can prevent a disaster. If you live somewhere floods aren’t common, you might not even be aware your home has one. But every home should have one because it prevents water buildup, which can lead to health issues, structural issues, and mold growth, among other things you want to avoid. Sump pumps can be incredibly resilient, and they don’t need much from you, but they still need some level of maintenance to make sure they have a long-life span. If you notice your sump pump is not working as it should, make sure to call a professional so they can check it out. To avoid neglect, here’s what you can do: Every three or four months you must: Clean the sump pump screen or inlet opening gently. Make sure the power cord is in good condition and plugged into a Ground Fault Circuit Interrupter outlet. Also, test the sump pump by pouring a bucket of water over it and seeing how it responds. It should turn on immediately once the water raises the float. If it doesn’t, make sure the float is well-adjusted. During this test make sure the sump pump is level and upright. Once a year, preferably during rainy season, you must: Do a visual inspection of your sump pump. If you notice it’s not working as it should, call a professional to see if there are any issues you need to solve. You also must remove it and clean it once a year, religiously. Flush it with water, replace the pump, and clean the pit as well. Every two or three years you must: Replace the batteries. Check your basement for cracks on the walls or windows and check your home foundation as well. Make sure the drain of the sump pump is not blocked and check that the drainpipe is pointing away from your house. Also, clear your downspouts and your gutters to make sure your sump pump can drain the water effectively. As you can see, your sump pump needs you to check up on it throughout the year. The good news is that maintenance is super easy and simple. Just follow these steps and your sump pump won’t only function better, it will also last longer. These appliances are necessary, and they could save you the trouble of serious flooding if you just keep them alive and working. This is particularly necessary if you live in an area where floods are quite common, so make sure you understand what your sump pump does for you and keep up with its maintenance.
By nat rosasco December 12, 2019
During winter, we need to use a lot more energy than the rest of the year to keep our house warm and cozy. Therefore energy bills tend to skyrocket during this time. But guess what? You can keep your energy costs low if you practice these useful tips! 1. Upgrade your thermostat and keep it low A thermostat that’s programmable will allow you to customize a heating schedule so you can save money by only having heat when you really need it. A smart thermostat is even more effective when it comes to saving both money and energy because it has a lot more options, not to mention you can control it from your smartphone. If you don’t have one of these, the best thing to do is upgrade. When you have it, make sure to keep it low. Set your temperature back 7 to 10 degrees, and during winter, make sure you set it at 68 degrees when you’re not home and when you’re sleeping. 2. Keep your filters clean The filters on your HVAC system need to be properly maintained if you want it to work efficiently and help you save money and energy during winter. You need to make sure they’re clean and check them regularly to see if they need to be changed. Also, make sure you always use the correct filters for your specific system . 3. Don’t heat uninsulated areas Rooms and areas that haven’t been insulated lose heat very quickly, which means they’ll drain your energy quite a lot. Therefore it’s not a good idea to heat areas such as garages and crawlspaces. And if there’s an area in your house where you spend a lot of time and it’s not insulated, you should definitely consider the investment. 4. Check your home’s insulation Speaking of insulation, it’s very important that you keep an eye on it. Good insulation will keep your home comfortable during the entire year. One of the areas that really need to be insulated is the attic because heat rises and if it’s not insulated correctly, during winter, the warm air will escape from your house and that’s not at all what we want. 5. Change your light bulbs If you’re smart about the kind of light bulbs you use, you’ll save a lot of energy. LED bulbs, for example, need 75% less energy than incandescent bulbs and they last about 25 times longer. This means they’re a great investment not only because they will help you keep your energy costs low, but because you won’t have to replace them as often. Also, practice good habits. If you leave a room, turn off the light. If you’re not watching the TV, turn it off. These changes will allow you to save quite a bit of energy and therefore money. It truly doesn’t take much to save energy during the winter, all you need to do is make sure you use your resources more efficiently.
By nat rosasco December 12, 2019
Popcorn ceilings , also called textured or acoustic ceilings, grew popular in the late 1950s. The appearance varies from a very think texture like popcorn to something like cottage cheese and even very fine like sand. During the era when textured ceilings were popular, builders used them in homes because they were inexpensive and could hide imperfections with ease. Popcorn ceilings were made to bolster the room’s acoustics via the reduction of ambient sounds and echoes. However, acoustic ceilings have become somewhat obsolete in new homes and modern homeowners and buyers do not find them aesthetically appealing as they also give the home an outdated and old appearance. Here’s a rundown of the pros and cons of popcorn or acoustic ceilings. Pros Although popcorn or textured ceiling has become outdated, some benefits are still attached to its usage. One of such is that they help to conceal imperfections on the ceiling. Such imperfections include the tape and dirt seams used for your plasterboard. Although a flat or non-textured finish will appear nice, finishing neatly is often difficult because each dent or ripple may show. Moreover, popcorn ceilings hide damage, leaks, cracks, and poor workmanship. That's not all, these ceilings reward owners with low-cost and easy installation. These ceilings also have noise dampening qualities. It is specifically nice for multi-story homes and apartments where the goal is to reduce noises or sounds from a higher level. Cons Opting to install or purchase a home with popcorn ceilings has many disadvantages. First and foremost, the texture is pretty heavy. This means it is much harder to paint acoustic ceilings than that with a smooth surface. You should consider this factor if you’re big on frequent redecorating. Moreover, repairing textured or acoustic ceilings is quite tasking. If this ceiling gets broken or damaged, you must cut off the damaged portion, and then match the color and feel once the repair is done. So, although several products may help fix the ceiling, there will be signs of inconsistencies. If you want a uniformed repair, you may need to redo the ceiling from scratch. Also, textured ceilings are rough to the touch, so this makes cleaning quite difficult. Because of this, they don’t suit bathrooms and kitchens well. You should settle for a different style of finish in these rooms. The major difficulty of acoustic ceilings is removal. For one, removal is expensive and labor intensive. You may need to hire a professional to remove the ceilings throughout your home. Although some homeowners may want to take this as a do-it-yourself task or project, the process is time-consuming and difficult. You must plan several days to conclude the project. There is also the problem of asbestos, which many older, textured ceilings have. This complicates removal and makes the process hazardous. Do well to test the ceiling for asbestos before taking up the removal project yourself. Asbestos fibers can cause lung cancer, lung disease, and scarring of the lungs when inhaled in large quantities. In all, the cons of popcorn ceilings outweigh the pros. Consider your time, money, design choices and the process of removal before you make a decision.
By nat rosasco December 12, 2019
As days get colder and colder, it’s important we prepare for winter. If you’re one of those lucky people who have a fireplace at home, it’s about to get a lot of use. And that’s great, because you’ll be able to save energy and keep your bills low. However, it’s important to practice safety, so here are a few tips you help you out! 1. Keep your fireplace maintained It’s important that you keep up with your fireplace’s maintenance, otherwise it can be dangerous once you start to use it. Chimneys are recommended to be swept once a year, have you done that? If you haven’t, you’ll need to so you can remove all the debris and soot. Another thing you should do every year is check that the chimney cover is secure so you don’t have to deal with animals or outside debris. Make these things a yearly habit and you’ll be much safer. 2. Stock up on seasoned hardwood Seasoned hardwood should always be your first choice when you’re stocking up for the winter. Seasoned wood means it has been dry for at least six months and it’s quite dense, so it’s perfect to keep your fire burning smoothly. Plus, seasoned hardwood creates less dark and thick smoke, which leads to build-up. Also, remember not to put too much wood in when you’re setting up your fireplace. A small fire means less smoke and less heat, which helps you prevent cracking and soot build-up. 3. Prepare the area surrounding the fireplace This is one of the fireplace safety tips you need to pay more attention to. You need to make sure the area that surrounds the fireplace is prepared for the winter. That means you should remove any hangings, furniture or decorations that are too close to the fireplace. I don’t mean you shouldn’t decorate your fireplace for the holidays, just make sure you take these things down when you’re building your fire. Also, make sure your home is prepared as well by checking that your smoke alarm works perfectly, especially the one closest to the fireplace. 4. Get a carbon monoxide alarm Having a smoke alarm is great, but also having a carbon monoxide alarm is better. Slow burning fires can lead to a build-up of carbon monoxide, so you should definitely get an alarm for this because otherwise this dangerous gas is undetectable until it is sometimes too late. They’re a little expensive, yes, but they’re a great investment, especially when you consider that they’re really easy to maintain and they will give you a lot of peace of mind. 5. Always clean your hearth Every time you make a fire, make sure you clean your hearth afterwards. Remove all debris and ashes and dispose of them safely. Wait for them to cool down first and then add a little water before throwing them out. Fireplaces are wonderful and they allow you to create a cozy environment for your family on cold winter nights. Make sure it’s safe for everyone!
By nat rosasco November 18, 2019
Candles smell and look nice, but after burning and enjoying them it starts to become apparent their impact on our homes and interior décor. Although beautiful, candles can deposit soot on surrounding surfaces, including tables and walls. Your first impulse might be to just clean it off, as you would any speck of regular dirt or dust, but the mere use of a normal sponge will spread and smudge the stains. There are special sponges available at hardware stores, made specifically to clean surfaces stained by soot. You can use these sponges to clean and dry the wall as they remove much of the soot on the surface of the wall before you use a liquid cleaning solution. But how do you keep the soot away from the wall in the first place? Find tips below to avoid candle soot.
By nat rosasco November 18, 2019
Regardless of the time you spend on routine maintenance to ensure everything in the home is working fine, you should always be prepared for unforeseen failures and breakdown of appliances and equipment in the home. However, with proper maintenance, you can spot these problems before they get out of hand. Consequently, you save yourself money, stress and time. Persistent, nagging problems at home can and will get worse if you do not address them quickly. In this article, we explain what you can and should fix before they become quite expensive to repair.
Show More